Introduction:
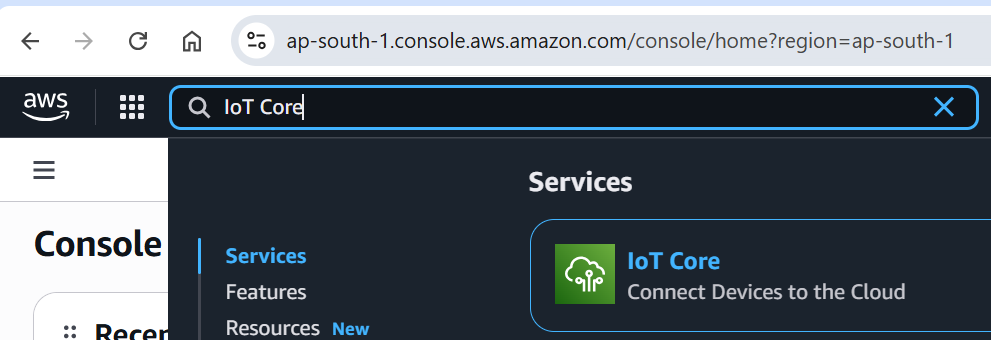
In our previous blog, we demonstrated how to set up an AWS IoT Core account and control a relay using an ESP32. That project was a great starting point for cloud-connected home automation.
In this tutorial, we will take it a step further by integrating an MQ-2 gas sensor with the ESP32 to detect harmful gases like LPG, methane, and smoke. The ESP32 will send these readings to AWS IoT Core, and our custom mobile application will provide real-time alerts, ensuring you are immediately notified of any potential hazards.
By the end of this blog, you’ll have a working system that not only automates devices but also enhances home safety with instant mobile notifications.
About MQ-2 Sensor:
What gases it detects:
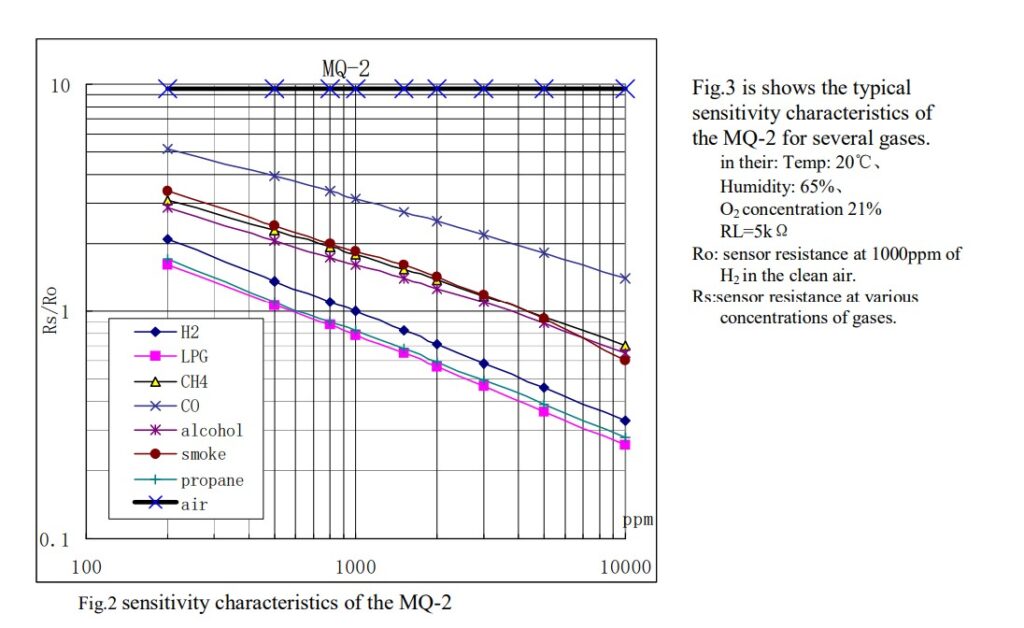
The MQ-2 gas sensor is a low-cost and easy-to-use sensor that can detect a variety of gases commonly found in homes and workplaces. It is widely used for home safety and DIY IoT projects.
What Gases the MQ-2 Sensor Can Detect:
- LPG (Liquefied Petroleum Gas) – commonly used for cooking
- Methane (CH₄) – found in natural gas and biogas
- Butane (C₄H₁₀) – another fuel gas often found in lighters
- Smoke – from combustion or fire sources
- Hydrogen (H₂) – produced in some industrial processes
- Alcohol vapors – volatile organic compounds
- Propane (C₃H₈) – used in some household fuel systems
⚠️ Note:
The MQ-2 sensor detects the presence of combustible gases like LPG, methane, smoke, and alcohol vapors, but it cannot tell which gas it is. It only gives a voltage output proportional to the overall gas concentration in the air. Perfect for DIY projects and experimentation, but not for precise gas identification.
Hardware Requirements:
o build this project, you will need the following components:
| Component | Purpose |
|---|---|
| ESP32 Development Board | Acts as the main controller and connects to AWS IoT Core |
| MQ-2 Gas Sensor Module | Detects gases like LPG, methane, and smoke |
| Relay Module | Used to control appliances remotely via AWS IoT |
| Jumper Wires | For making connections between ESP32, sensor, and relay |
| Power Supply | 5V for MQ-2 and relay, 3.3V logic for ESP32 |
| Breadboard (optional) | For easy prototyping without soldering |
Circuit Connections:
MQ-2 Gas Sensor → ESP32
📌 Safety Note for MQ‑2 Gas Sensor
In many hobby projects, the MQ‑2 gas sensor is connected directly to the ESP32 analog input pin for simplicity.
While this works in many cases, it is not technically safe long-term because the MQ‑2 outputs up to 5V analog signals, and ESP32 ADC pins are designed for maximum 3.3V input.
Direct connection can lead to:
- Gradual damage to ESP32 input pins.
- Inaccurate sensor readings.
- Reduced reliability over time.
✅ Recommended: Use a simple voltage divider or logic level shifter to scale the MQ‑2 analog output down to safe levels for the ESP32.
- VCC → 5V (power for heating element)
- GND → GND
- A0 → GPIO34 (analog input for reading gas level, use a 5v to 3.3 level shifter)
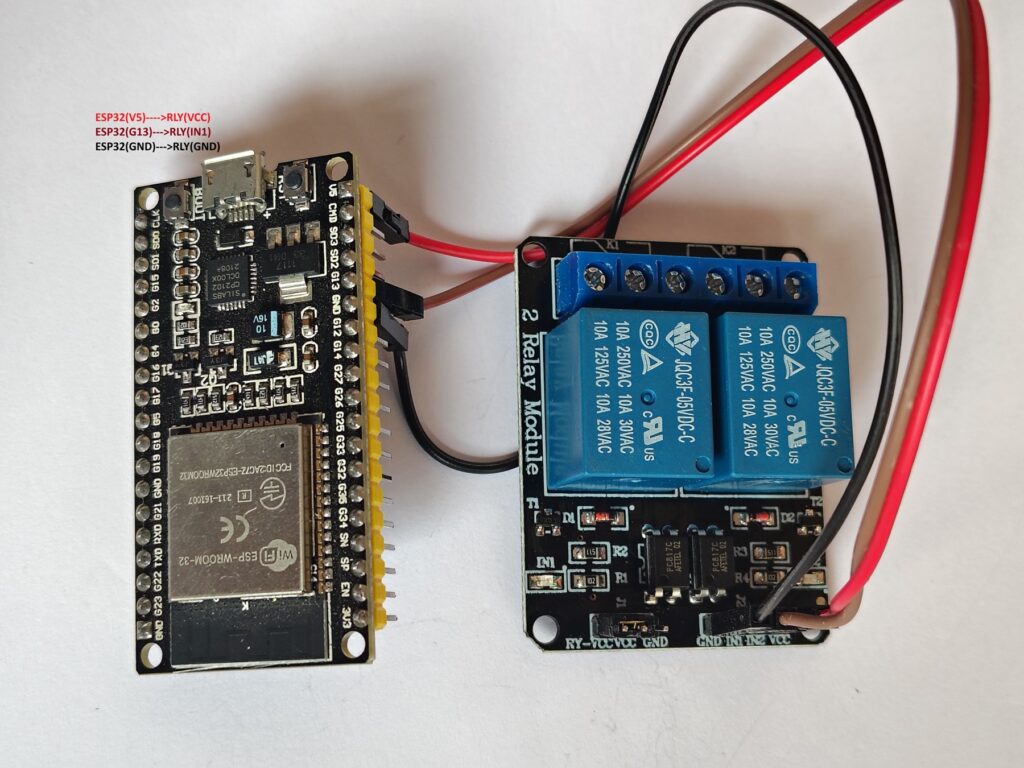
Relay Module → ESP32 (from previous blog)
- VCC → 5V
- GND → GND
- IN → GPIOXX (same GPIO as used previously for relay control)
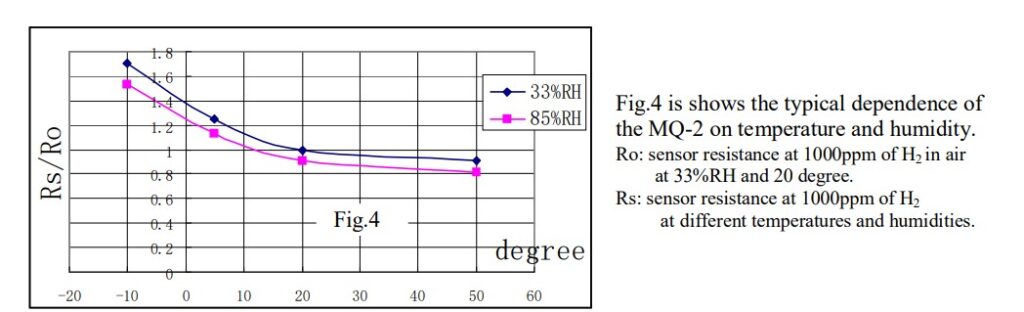
Tip: Keep the MQ-2 sensor powered for a few minutes before taking readings to allow it to warm up for accurate measurements.
Firmware Logic:
We take the average of 50 ADC samples from the MQ-2 sensor to ensure stable and reliable readings. This averaged sensor data is then published to AWS IoT Core on the topic:
$aws/things/esp32/sensor/mq2sensor
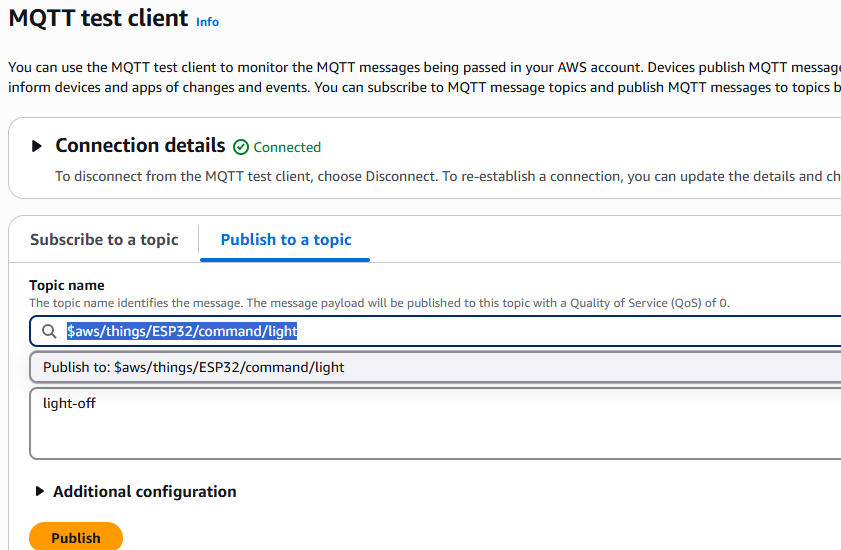
Alongside this, light control messages are also published to:
$aws/things/esp32/devices/light
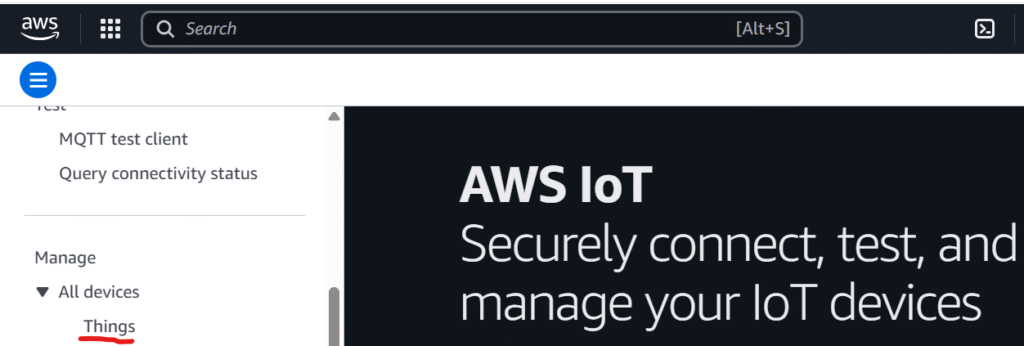
For details on how to configure AWS IoT Core and set up publishing and subscribing to topics, please refer to our previous article.
#include <WiFi.h>
#include <WiFiClientSecure.h>
#include <PubSubClient.h>
#include <ArduinoJson.h>

#define MQ2_PIN 34  // ADC pin
#define LIGHT 13

// -------- WiFi ----------
const char* WIFI_SSID = "CHANGE_ME";
const char* WIFI_PASSWORD = "CHANGE_ME";

// -------- AWS IoT ----------
const char* AWS_IOT_ENDPOINT = "CHANGE_ME";  // your AWS IoT Core endpoint
const int AWS_IOT_PORT = 8883;

// Certificates (download from AWS IoT Core)
const char* AWS_CERT_CA = R"EOF(
-----BEGIN CERTIFICATE-----
Replace with your CA content
-----END CERTIFICATE-----
)EOF";

const char* AWS_CERT_CRT = R"EOF(
-----BEGIN CERTIFICATE-----
Replace with your Certificate content
-----END CERTIFICATE-----
)EOF";

const char* AWS_CERT_PRIVATE = R"EOF(
-----BEGIN RSA PRIVATE KEY-----
Replace with your Private Key
-----END RSA PRIVATE KEY-----
)EOF";

// -------- Global Variables ----------
WiFiClientSecure net;
PubSubClient client(net);
int mq2Threshold = 200;

// -------- Functions ----------

// Read MQ2 sensor with averaging
int getMQ2Reading(int samples = 50) {
    long sum = 0;
    for (int i = 0; i < samples; i++) {
        sum += analogRead(MQ2_PIN);
        delay(2);
    }
    return sum / samples;
}

// Handle incoming JSON threshold update
void handleThresholdMessage(char* message) {
    StaticJsonDocument<200> doc;
    DeserializationError error = deserializeJson(doc, message);

    if (error) {
        Serial.print("JSON parse failed: ");
        Serial.println(error.f_str());
        return;
    }

    if (doc.containsKey("threshold")) {
        mq2Threshold = doc["threshold"];
        Serial.print("Threshold updated: ");
        Serial.println(mq2Threshold);
    }
}

// Publish JSON payload to MQTT
void publishMessage(const char* topic, const String& payload) {
    client.publish(topic, payload.c_str());
    Serial.printf("Published [ %s ] %s\n", topic, payload.c_str());
}

// Handle device commands from MQTT
void handle_mqtt_msg(char* topic, byte* payload, unsigned int length) {
    if (strstr(topic, "$aws/things/esp32/devices/light")) {
        if (strstr((const char*)payload, "light-on")) {
            digitalWrite(LIGHT, LOW);
            Serial.println("LIGHT ON");
        } else if (strstr((const char*)payload, "light-off")) {
            digitalWrite(LIGHT, HIGH);
            Serial.println("LIGHT OFF");
        } else {
            Serial.println("LIGHT INVALID COMMAND");
        }
    } else if (strstr(topic, "$aws/things/esp32/sensor/mq2sensor")) {
        handleThresholdMessage((char*)payload);
    }
}

// Prepare sensor data as JSON string
String prepareSensorData(int value) {
    StaticJsonDocument<200> doc;
    doc["value"] = value;
    String payload;
    serializeJson(doc, payload);
    return payload;
}

// MQTT callback
void messageHandler(char* topic, byte* payload, unsigned int length) {
    Serial.print("<< ");
    Serial.print(topic);
    Serial.print(" ");
    for (unsigned int i = 0; i < length; i++) {
        Serial.print((char)payload[i]);
    }
    Serial.println();
    handle_mqtt_msg(topic, payload, length);
}

// Connect to AWS IoT Core
void connectAWS() {
    net.setCACert(AWS_CERT_CA);
    net.setCertificate(AWS_CERT_CRT);
    net.setPrivateKey(AWS_CERT_PRIVATE);

    client.setServer(AWS_IOT_ENDPOINT, AWS_IOT_PORT);
    client.setCallback(messageHandler);
    client.setBufferSize(4096);

    Serial.print("Connecting to AWS IoT Core...");
    while (!client.connected()) {
        client.connect("esp32-gas-sensor");
        Serial.print(".");
        delay(1000);
    }
    client.subscribe("$aws/things/esp32/sensor/mq2sensor");
    Serial.println(" connected!");
}

void setup() {
    Serial.begin(115200);
    pinMode(LIGHT, OUTPUT);

    // Connect to WiFi
    WiFi.begin(WIFI_SSID, WIFI_PASSWORD);
    Serial.print("Connecting to WiFi...");
    while (WiFi.status() != WL_CONNECTED) {
        Serial.print(".");
        delay(1000);
    }
    Serial.println(" connected!");

    // Sensor warm-up
    Serial.println("Warming up sensor...");
    for (int i = 120; i > 0; i--) {
        Serial.printf("Time left: %ds\r", i);
        delay(1000);
    }
    Serial.println("\nSensor is ready!");

    connectAWS();
}

void loop() {
    int sensorValue = getMQ2Reading();
    int mappedValue = map(sensorValue, 0, 4095, 0, 1024);

    static unsigned long lastTime = 0;
    unsigned long currentTime = millis();

    if (currentTime - lastTime > 5000) {  // every 5 seconds
        lastTime = currentTime;
        Serial.printf("MQ2 ADC Reading: %d\n", mappedValue);
        publishMessage("$aws/things/esp32/sensor/mq2sensor", prepareSensorData(mappedValue));
    }

    if (!client.connected()) {
        connectAWS();
    }

    client.loop();
}
Hands-on Testing with AWS IoT Core Client:
Hardware Setup
Connect the MQ-2 sensor as shown in the above circuit diagram.
Upload Firmware
Flash the ESP32 firmware after updating your Wi-Fi credentials, AWS endpoint, and certificates.
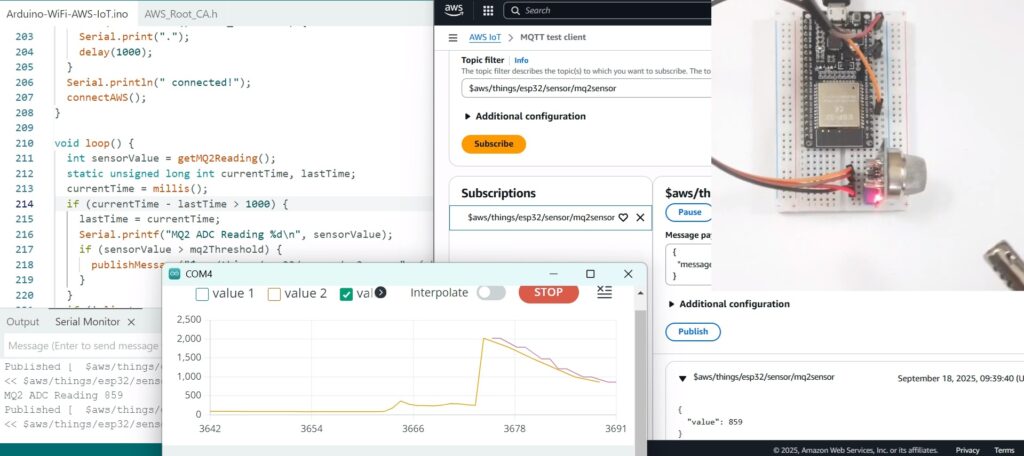
Monitor Output
Open the Serial Monitor or Serial Plotter in Arduino IDE.
In normal conditions, you should see ADC readings in the range of 100–200.
Now bring a gas lighter close to the sensor and press the button. You will notice the ADC readings rise sharply.
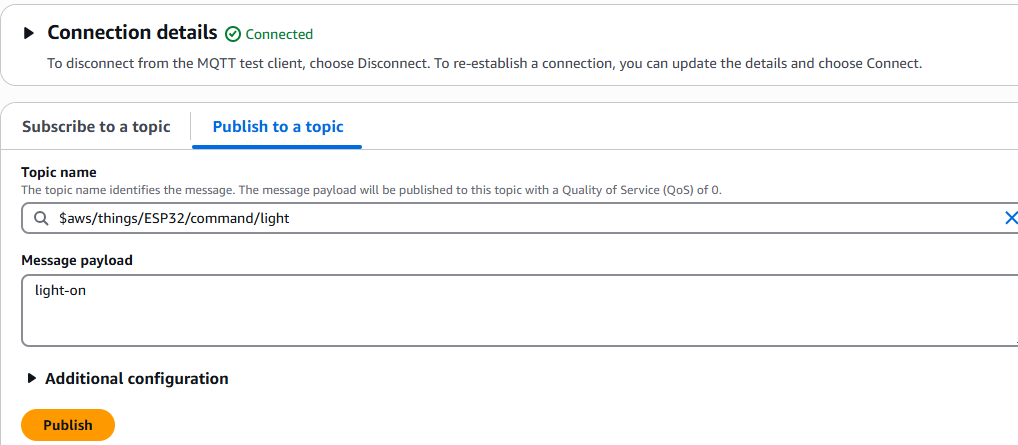
Threshold & AWS Publish
Once the reading crosses the default threshold, the ESP32 will publish a message to AWS IoT Core.
(Refer to the figure below for the AWS IoT Core dashboard output).
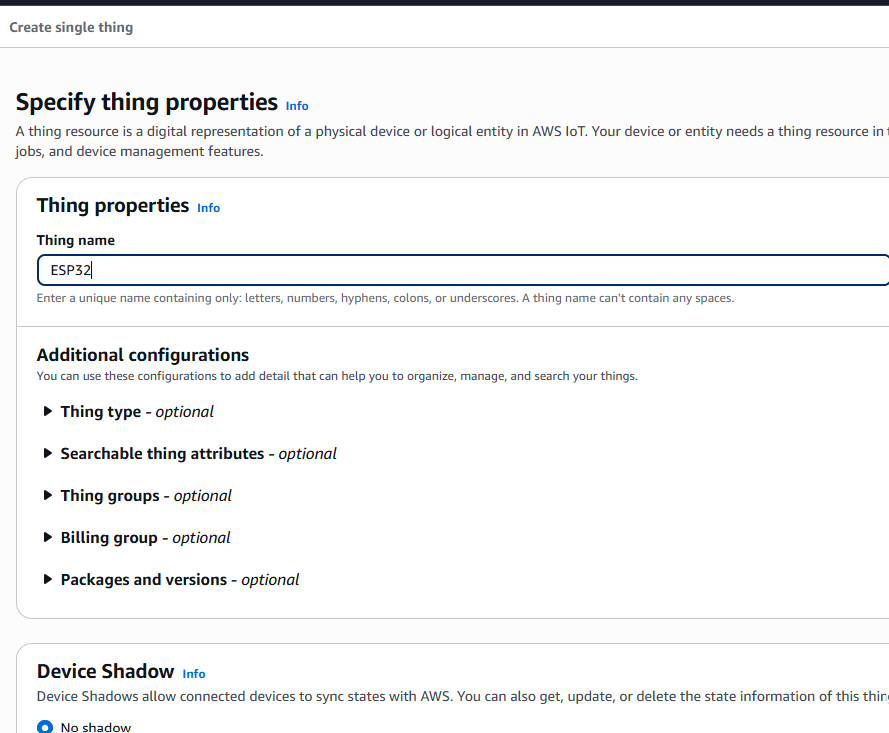
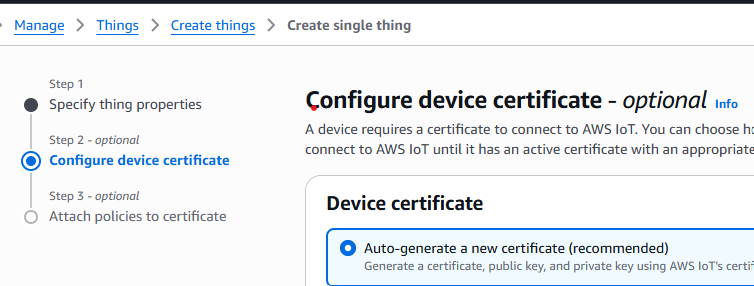
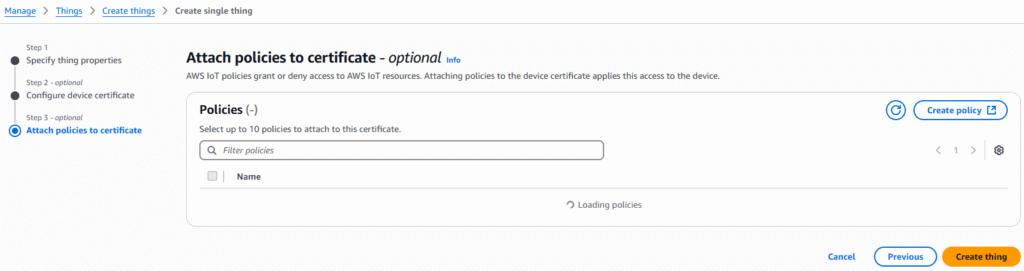
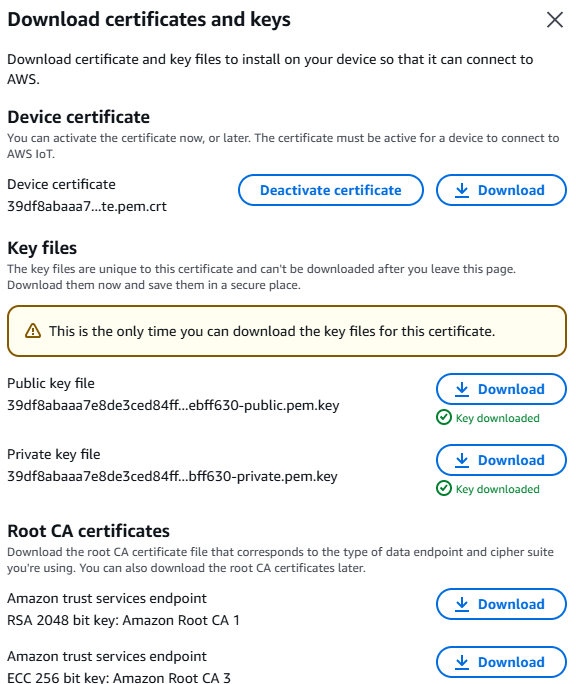
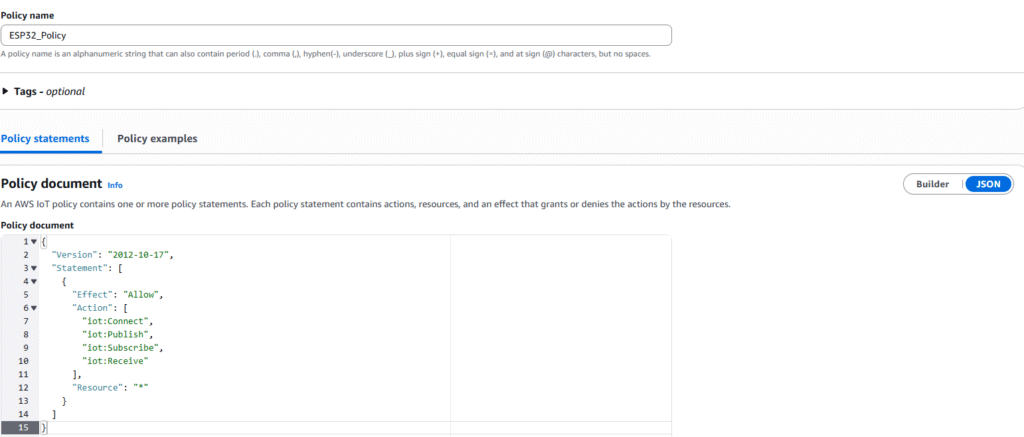
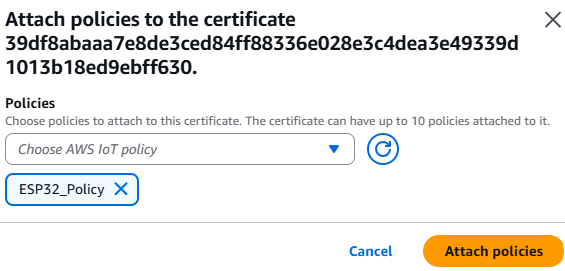
👉 For AWS IoT Core certificate and policy setup, please refer to our previous blog.
👉 In the next part, we will cover Android App configuration and implementation for receiving notifications.